Step 1. Add products.
The first thing you need to do is add products. There are 3 ways to add a product: import, scan, or create manually.
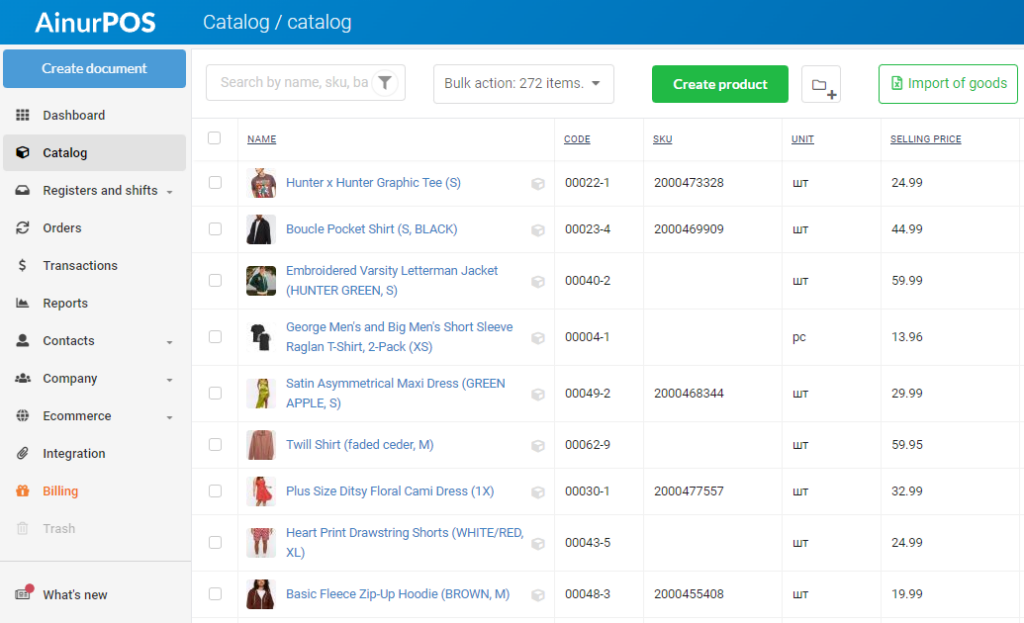
In both the app and the web version, you can easily enter your initial balances.
Step 2. Add employees and set up cash registers.
You need to create an employee and give him certain access rights. The roles of employees can be different: cashier, storekeeper, and manager.
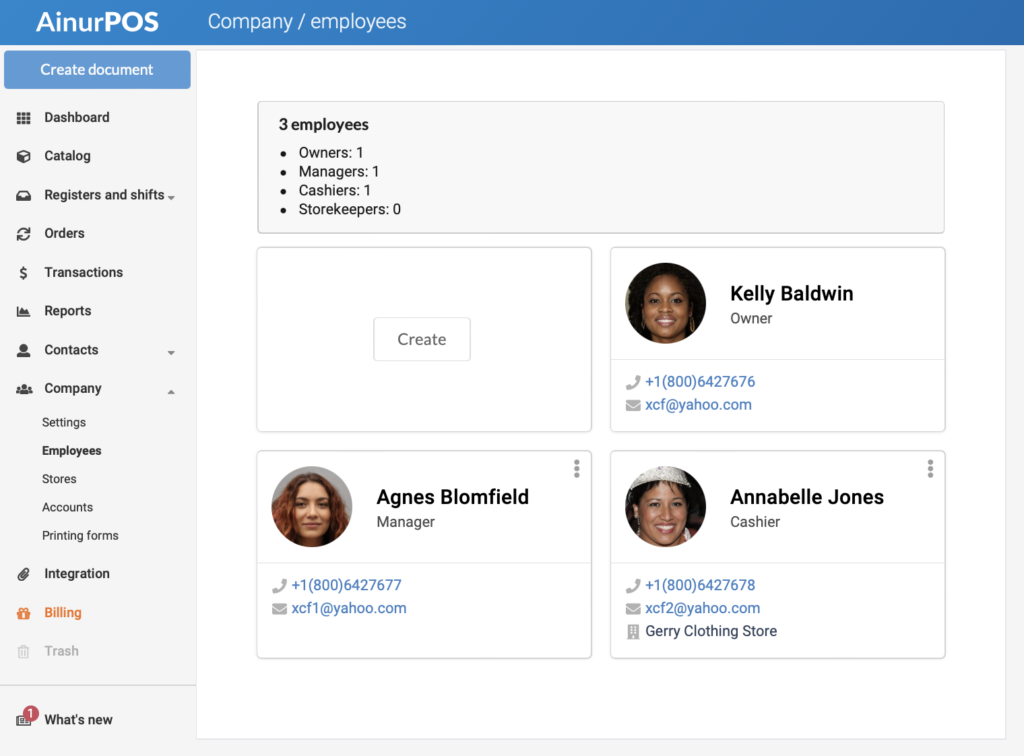
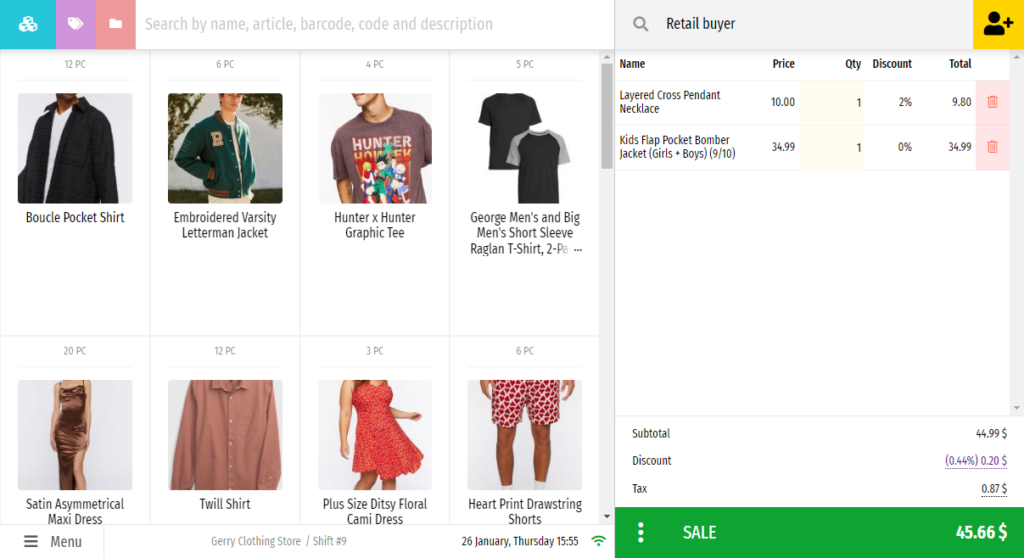
As soon as you have a cashier, there must be a workplace for him. If you have a PC or laptop, it will be convenient for you to access the cashier interface directly from the web version, and for Android devices there is the CloudShop: POS application. But before an employee starts selling, find out how to get started at the cash register.
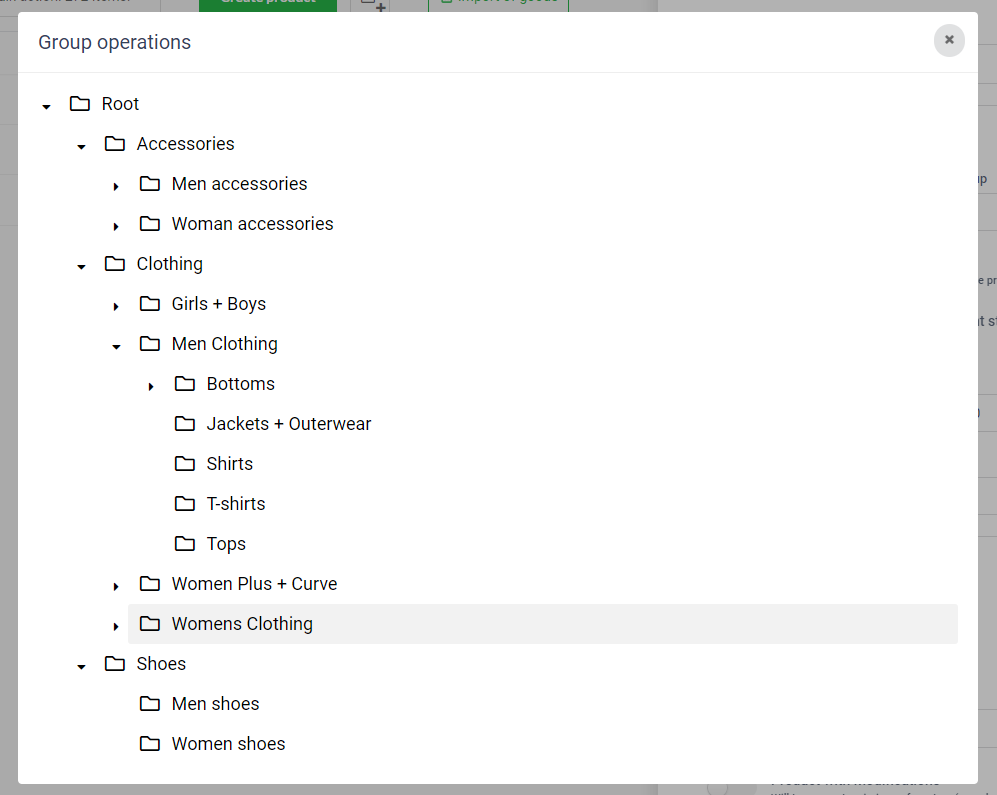
Step 3. Tidy up
If you did not bring in the assortment in groups, then it’s time to sort it in AinurPOS. In the program, you can assign a category to a product or assign it to a group/subgroup. What are groups and categories for, and how not to get confused about them and do everything right? We tell here. Do you need to create the same product in several sizes? Set the model/size range using modifications.
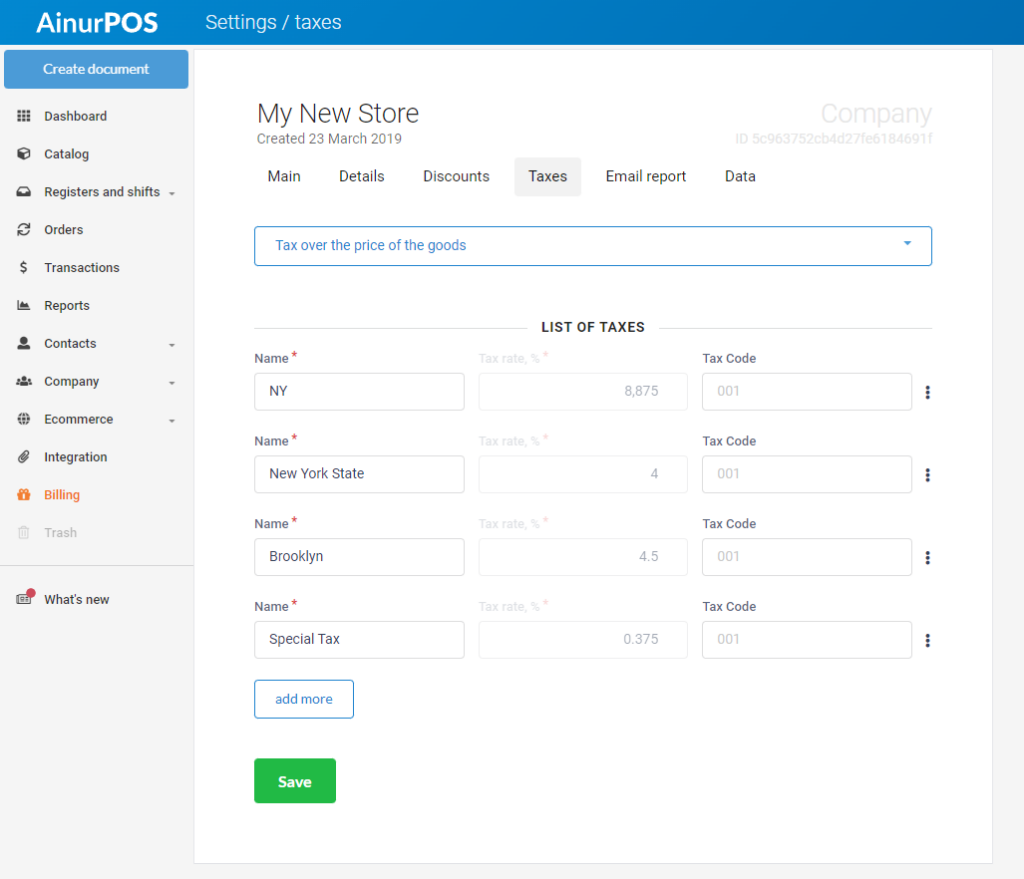
Step 4. Set up the currency, taxes, discounts, receipts, and price tags.
Now you can work on enterprise settings In the web version, this section is called “Company”. In the application, the settings are hidden in the side menu, under the login line. Here you can set the currency, name, company details, address, and phone number, and set up pre-installed and cumulative discounts. Here you can set up the taxes that apply in your country.
It is necessary to set up receipts and price tags. For the first ones, there is a “Receipt Design” section when you create a cash register. You can display the phone number and address of the store, logo, or information about upcoming promotions on the receipt.
Make price tags in the price tag constructor. They can be any size, with or without a photo.
Step 5. Select and pay for the license.
You have two weeks from the date of registration to select a license. The trial period cannot be repeated or extended. We’ve collected the FAQ about payment in one article to make it easy for you to navigate